Add a reversion
If the working interest changes at any point in the project's life, this can be recorded as a reversion. Contractual changes, new deals between partners, partners leaving or joining the project — all of these can be handled as reversions.
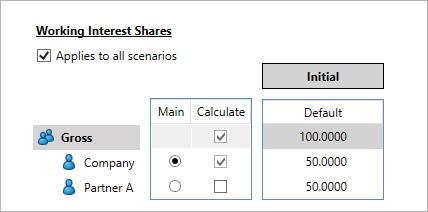
- In the Manage Inputs workspace, open a project and navigate to the Settings tab. The Working Interest Shares panel will be displayed at the bottom of the screen.
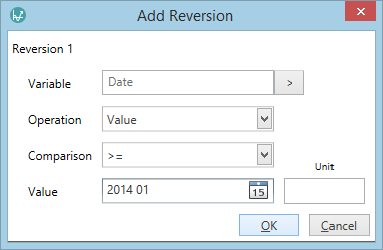
- Click the Add Reversion button on the Project Home tab of the ribbon. The Add Reversion window will open.
- Click the button next to the Variable field and select a variable in the window that opens. This variable will act as the reversion trigger. By default, dates are used as triggers.
- Fill in the fields in the Operation, Comparison, Value and Units columns.
- After the reversion has been set, a new reversion tab named "Reversion 1" will appear in the Working Interest Shares window.


Reversions can be edited by clicking the Trigger button. You can create as many reversions as required. Note that you cannot insert a new reversion between two existing ones; if a reversion's trigger precedes that of the reversion(s) before it (eg. Reversion 2 is triggered before Reversion 1), the preceding reversion(s) will not be triggered.
Note: If any partner's share is 0% before or after a reversion, it is recommended to leave this partner on the diagram with the share of 0%. If you delete this partner, it will be removed from the working interest setup completely.
